Are you a photographer who is having trouble getting new clients?
If so, do you have your own website?
Now, that doesn’t mean a Facebook page. A Facebook page is great for getting yourself out there and engaging on social media, but it doesn’t reach your entire potential online audience.
Why? You may ask.
Because potential clients and followers want to be able to visit a professional website to learn more about your brand.
You see, many people in your Facebook audience aren’t ready to book your photography services yet. They may ‘like’ your photos and posts, but will still want to know more about you before they are ready to pay to hire you.
If you think having your contact information on your Facebook page is enough to convince clients to book with you, you’re leaving behind a large portion of your audience. This is where a professional website comes in.
Your website should be an extension of your social media accounts, and vice versa.
An attractive website can:
Act as a round-the-clock salesperson for your photography business
Help you establish authority and trust with your audience
Serve as a cheaper and more accessible ‘studio’ where you can showcase your portfolio
Promote your brand past the places where social media can reach.
So, are you ready to build your professional photography website now?
What’s that? You have no clue how to build a website and you don’t have the resources to hire someone to do it for you?
No problem!
This guide will walk you through the steps you need to take to build your first super amazing photography website– from concept to launch.
Let’s get started.
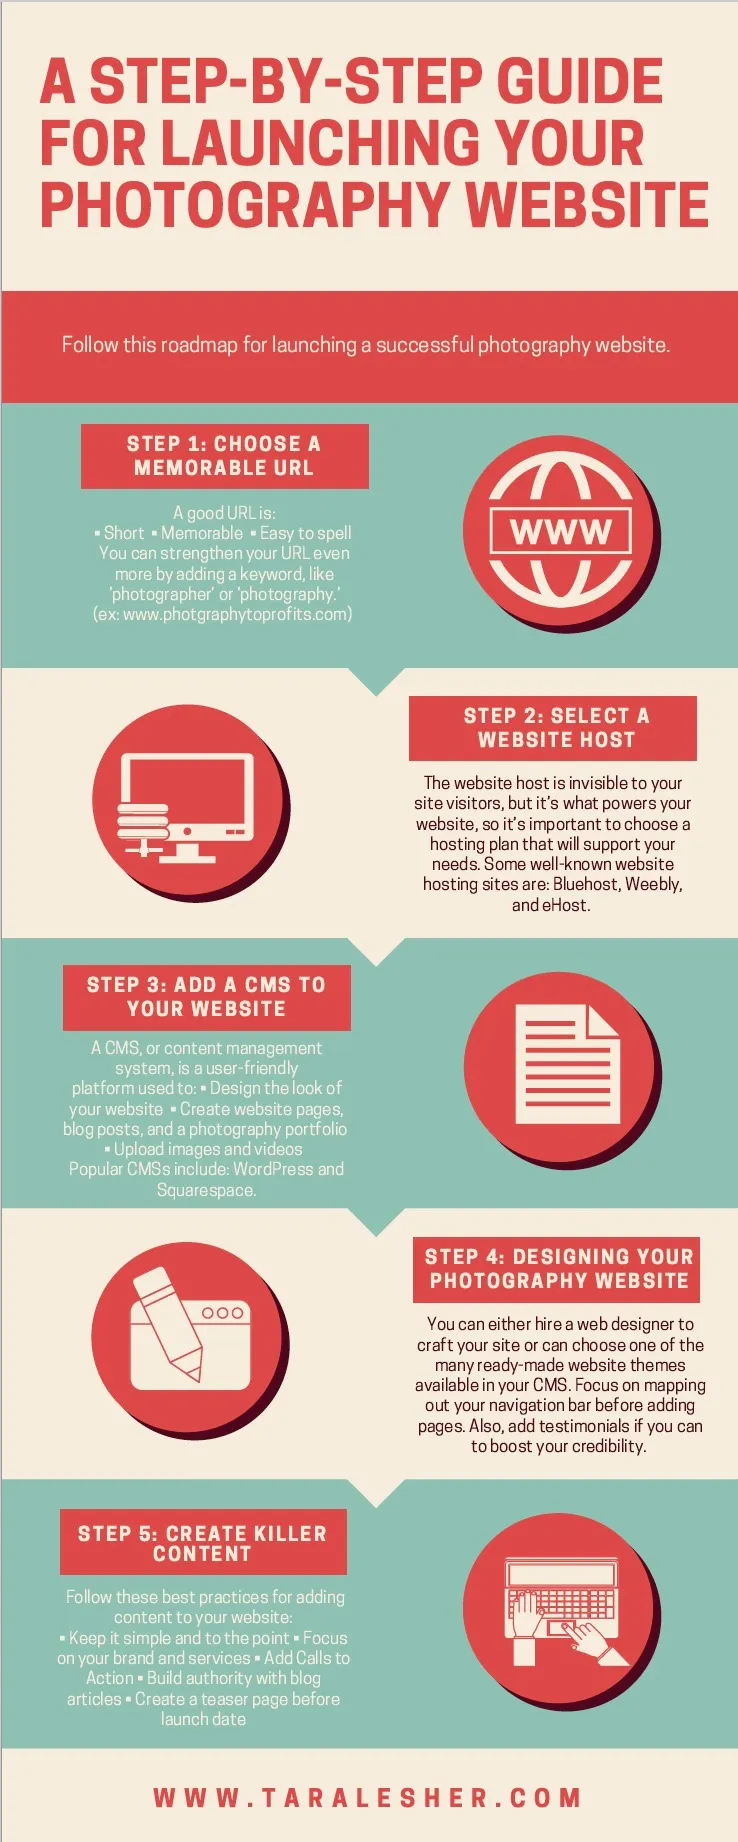
Step 1: Choose a memorable URL
A URL is the web address people will type into their browser (Google, Firefox, etc.) to find your website. It’s a unique address that starts with ‘www’ and ends with ‘.com.’
A good URL is:
Short
Memorable
Easy to spell
You can strengthen your URL even more by adding a keyword, like ‘photographer’ or ‘photography.’
The main goal behind choosing your URL should be to make it easy for clients to remember and find your website. This is important because it may take a while for your site to get picked up by search engines, so visitors have to get the URL right for them to land on your page.
Worse comes to worst, you can change your URL later on, but this can be tedious, which is why you should brainstorm at least 7-10 potential URLs for your site. This is also a good practice because many times your first-choice URL will be taken.
To simplify the process even further, or to get your creative juices flowing, you can use a free online domain name generator to get you going. A few examples include:
Dot-o-mater– Takes two name lists and combines them together to come up with a unique domain name that you can use as your URL.
Name Mesh– Uses different categories to generate URL ideas
NameStation– Has an added “Crowdsourced Name Contest” feature that employs a community of domain researchers to select the perfect URL for your business.
To make sure the URL you’ve chosen is available, you’ll have to check a domain name registry, like:
Even if your desired URL is available, before you settle on your domain name and URL, you should first make sure:
-Matching social media handles are available
-There is no existing business with a similar URL that could be confused with yours
-You buy similar names to prevent someone from “cybersquatting,” which is using a similar domain name to profit from your brand.
To explain #3 above: if you want to use www.happyphotographystudio.com, you may also want to purchase and register, www.thehappyphotographystudio.com.
It’s also a good idea to claim the same domain name with the URL extension ‘.org’ and ‘.net.’ Some website registrars may even offer to bundle these extensions as a package with your main .com site before you check out.
Once you have brainstormed a catchy and relevant URL, checked to see if it’s available, and registered your domain name, you’re ready to move on to the next step.
Step 2: Select a Website Host
Now that you have your unique URL, you can set up a hosting plan.
What’s the difference between a URL and web hosting?
Well, your URL is like your street address in cyberspace, whereas hosting is like land that you can rent to have your website home sit on.
The website host is invisible to your site visitors, but it’s what powers your website, so it’s important to choose a hosting plan that will support your needs. Some popular website hosting sites are: Bluehost, Weebly, and eHost.
When it comes to hosting plans, you can choose from a few different options:
-Free hosting
-Shared hosting
-Dedicated hosting
As with everything: you get what you pay for. It’s highly suggested that you avoid using a free hosting plan, as tempting as it may be, because your hosting provider will likely tack their domain name onto yours so that it looks something like: www.YourDomainName.wordpress.com
Besides making your website look amateur, it also makes it harder for clients to type in your new, super-long URL to find your site.
Not to mention that free hosting plans load slower, which is not a good thing if you plan to add a portfolio of photographs. Slow load times causes poor user experience. To make matters worse, free hosting plans don’t support high volume web traffic.
In short, don’t go with a free hosting plan if you can help it.
Your second option is shared hosting. On this type of plan, your website host will lend the same server space to multiple websites.
Shared hosting is an economical way to host your website since the costs are shared by all the websites using the same server. Also, if any issues come up, your host is responsible for fixing it, just like a landlord would be.
However, that means you have to depend on your host to fix any server issues on their time. Also, because you’re sharing the server with other websites, you have limited bandwidth, making it easy for a traffic surge on another website to cause other sites in the shared space to be down.
Going with a dedicated hosting plan may cost more, but your website would have a server all to itself. That means you wouldn’t have to worry about your website being effected by another site.
You would also have more security and control over your website on a dedicated hosting plan. Having full server space to yourself also means your website’s content will load faster, giving your site visitors a better user experience.
Step 3: Add a CMS to your website
By now you’re probably wondering, “What’s a CMS? And what else do I have to do to launch my website already?!”
It’s okay, we’re almost there, and we are getting closer to the fun part: designing your website.
A CMS, or content management system, is a platform non-tech people can use to design the part of your website that visitors will see, without actually having to use computer code.
You can use a CMS to:
-Design the look of your website
-Create website pages, blog posts, and a photography portfolio
-Upload images and videos
Most CMS platforms are very user friendly since they are made to be used by the average computer user.
The most popular CMS (used by about 16 million websites) is WordPress. This is because WordPress is about as easy to use as Facebook. And, if you already have a domain name and website host, you can access the platform for free.
Additionally, the WordPress dashboard is set up for SEO (search engine optimization) and you can further optimize your site’s search engine visibility with photographer-specific SEO services, like Sweet SEO.
Before you pay anyone for SEO, read our free SEO guide for photographers first. Most of the fundamentals are things you can do yourself in a weekend.
With a ton of themes and plugins available, WordPress is highly customizable and it provides one of the easiest ways to launch your professional photography website.
Another popular CMS for beginners is Squarespace. The best part about Squarespace is that it includes a drag and drop feature so you can visually build up your website as if you were using Lego blocks.
Squarespace is easier to use than WordPress, but it also contains less themes and charges a small monthly fee since they offer to register your domain name and provide website hosting services. However, they do offer a free trial.
Squarespace is more of a one-stop shop, whereas WordPress is more customizable. To get your website on WordPress you’ll need to log in to your website host provider and install it from there. For Squarespace, you can simply create an account on their webpage and go from there.
Step 4: Designing your photography website
As creative, this should be the fun part of making your website, though getting it all in place make take some dedication and patience.
You have a range of options here that go from pick-and-go to customizable-and-complicated. Let’s break them down:
If you can’t afford or don’t want to hire a professional web designer then…
you can choose one of the many ready-made website themes available in your CMS. The key here is not to get caught up sifting through the hundreds of available themes.
Since you are looking to launch a photography website, add a filter to only view photography-specific themes. Don’t even bother wasting your time looking through themes in other categories because you’ll have to modify them to work as a photography website and it’s just not worth delaying your website launch for that.
However, it is a good idea to browse through photography sites you admire and take note of the features you like so that you can make them your own and implement similar features in your website.
Once you have a handful of potential themes, go through each one and make sure they offer the features you want, or at least as close to it as possible. If it comes to it, choose practicality over your favorite design since your website has to be functional in addition to being attractive.
If you want more flexible design options, you can choose customizable themes from sites like Avada, and Divi.
If you can afford and want to hire a professional web designer, then…
you can search for a web designer in your area, or find one that specializes in photography websites that works overseas through Upwork. Hiring an overseas designer may be more economical, but remember that whole bit about getting what you pay for.
Hiring a professional designer has its benefits because, aside from not having to do the design work yourself, a pro can really optimize your design in a way that will attract and convert more clients.
A note about logos…
Having a logo is a nice touch and adds a level of professionalism to your photography site. With that being said, you don’t need a logo to launch your site and you can always rework a logo you’re not 100% satisfied with in the future. Don’t let this small step cause you to push back your launch date.
Until you can get a logo done, use the name of your site in an easy-to-read font and use colors that match your site theme.
Alternatively, if you want a quick and cheap logo made, you can use a site like Fiverr. Logo designs start at $5, but be warned that the quality may not be what you’re looking for.
Mapping out your navigation bar
You should start mapping out your navigation bar before you add pages to your website so you can keep your layout organized. Try envisioning what a first-time visitor to your site would be looking for, but be sure not to clutter your header. You can always add a dropdown menu to the main header for additional pages.
Start organizing your pages by similarity. You can even give visitors a nudge in the right direction by adding a “Start Here” option in the header. For a photography website, some header ideas include: Home, Portfolio, Contact, Blog, About, Testimonials, and Pricing.

The point is to make navigation easy, simple, intuitive, and functional. Also keep in mind that a landing page with one specific purpose, like getting clients to fill out a contact form with their information, should be linked to directly (from an ad or a business card) and shouldn’t include a navigation bar so as not to distract visitors from the main purpose.
Add testimonials for credibility
Your new website will likely be difficult to find in search engine results in the beginning. This is because search engines don’t trust new sites. Your website’s credibility will build up over time with the more visitors it receives and the more links you create, especially if other trustworthy websites link back to you.
For this reason, adding testimonials to your site can boost your credibility factor to new visitors. It’s a way for them to see that other clients have validated your photography services. Testimonials can be very effective when added before calls to action, such as “Get a quote,” or “Book Now.”
Now that you’ve worked hard to map out and design your website, it’s time to add content.
Step 5: Create killer content with a purpose
Writing content for your website can be intimidating, but if you outline your main purpose for each page, the task becomes more manageable. Follow these best practices for adding content to your website:
Keep it simple and to the point- There is no need to write long, wordy website copy. Try creating a bullet list and adding a short description of your main points until you’ve covered the page topic.
Focus on your brand and services- Your testimonials should speak for the quality of your services, so you don’t have to go one and on about how you’re the best photographer in the area. Instead, focus on how your brand and services will fulfill a need or provide a solution to your audience’s problems.
Add Calls to Action- A call to action is meant to direct your audience to complete a certain action, like “Buy Now,” or “Download.” Make sure you add calls to action to motivate your visitors to do what you want, like “Book Now” or “Sign Up Today.” The call to action should match the page’s purpose and, when done right, will lead to more conversions.
Build authority with blog articles – Writing blog posts is one of the best ways to build trust and add credibility to your website. By providing website visitors with valuable information before you ask them to pay for your services, they’ll be more inclined to book you as their photographer. Brainstorm a handful of fresh and relevant photography topics that would interest readers and write an enticing article. If you really don’t like writing, then you can hire a blog-writing service to do this step for you.
Create a teaser page before launch date- It will likely take you some time to design your website and add content. Instead of having your website be a dead zone while you build it out, you can try adding a Welcome Mat, which is a full-screen call to action to greet visitors and ask for their email address. You can also consider adding a countdown-to-launch timer to build up anticipation.
Step 6: Pre-launch tools to stack up on
Before you launch your photography website, there are a few tools you should add to it so you can optimize your site for success.
Facebook Pixel– The Facebook Pixel is a snippet of code that you can add to website pages to track activity and actions taken by visitors who were directed to your website from a Facebook ad or Facebook page. The pixel should be added to every page you wish to track and can give you information like when a visitor fills out a contact form or views your portfolio.
Google Analytics– By adding Google Analytics to your site, you’ll be able to keep track of the amount of traffic your site gets, the source of your visitor traffic, your site’s bounce rate (the amount of time visitors spend on your site), and much more. With the help of Google Analytics, you’ll be able to visualize which pages and articles are attracting the largest audience.
List builder– A list builder is a pop up that appears on screen when a visitor lands on your site that prompts them to input their name and email address. The purpose of the list builder is for you to gather email addresses so you can reach out to potential clients later on through an email marketing campaign. It’s a good way to keep up in touch with your audience to send them new blog updates, promotions, and news that will build your photography brand and encourage people to book your services.
Heat Map– If you’re interested in knowing how far down most people scroll on your website pages or where they are clicking the most, you can add a heat map tracker. The heat map tool is a good way to test out the design of your website. You can use the results to optimize your page for higher engagement.
Step 7- Prepare for Launch!
Once the main elements of your website are set up, you are ready to launch! Though the idea of having a perfect and flawless photography website is nice, the truth is that if you spend time getting everything 100% just right, you’ll never launch your site.
Instead, consider your website a constant work in progress. Use the tools mentioned above to analyze your initial site, then work to optimize and improve it. The best thing you can do is set a launch date and work to have the main parts of your site functioning and professional looking.
If you’ve already followed all of the steps above, then you can set a 30-day target launch date just to give yourself time to tidy up your site, optimize your content and test it out on the backend.
To fine-tune your newly built site, go through it with a critical eye as if you were a new visitor. You may even want to enlist the help of a trusted friend or college since it may be harder for you to catch errors in your own work. When you find items that don’t work, make a list and prioritize it by things that must be fixed pre-launch and things that can be worked on after the official launch date.
You can also start announcing your upcoming site launch to friends, family, and colleagues as they will be the first visitors to your page once it’s up and running.
Step 8- Post-Launch Maintenance
Congratulations! You’ve launched your first professional photography website! Take some time to feel proud and bask in your achievement.
As great as it would be to be able to kick back and wash your hands of the website building business, you now have to put the effort in to maintain your site. If you want to attract web traffic to get more clients, you should practice the following:
Regularly publish new content, usually in the form of a blog post, anywhere form once a week (ideal) to once a month.
Direct your social media followers to your new website
Add your URL to your social media profiles and email signature
Habitually review your site’s performance using the tools mentioned in step 6 and make adjustments as needed to work towards site optimization
Repeat these steps at regular intervals to keep your site relevant and working smoothly
Launching your first photography website may seem like a daunting task at first, but if you take it step-by-step, you can build a professional website on your own. By following this website building roadmap you should now be able to showcase your best work online and start booking more clients in no time. Cheers to new conversions!
Download Website Launch Infographic
Written by Isis Darios, copywriter at www.thedigitalmarketingstudio.com